This is the companion blog to
'Alfresco Activiti talking to external database'. Here I show you how to unit test LogActionListener class. I am assuming you are already familiar with Alfresco, Activiti, SQL, Spring, JUnit,
Mockito framework and
H2 database engine.
Interestingly, this is an instance the unit test is more involved than the actual code it is testing. However, there is lots of good stuff here and it worth the read.
First let's get a 10,000 feet view of our JUnit test's flow.
- Initializing Spring framework
- Initializing H2 database engine and creating the test schema and table
- Using Mockito, recording expected Alfresco services behavior
- Instantiating the workflow and going through it from start to finish
- Validating database table to confirm the workflow has inserted the test record
- Dropping table, destroying schema and shut-downing H2 database server
- Cleaning up other test related resources
The test takes less than 10 seconds on my Laptop.
1. Eclipse project
Specifically for JUnit testing, I created a new Spring project in Eclipse. To download the project's ZIP file click
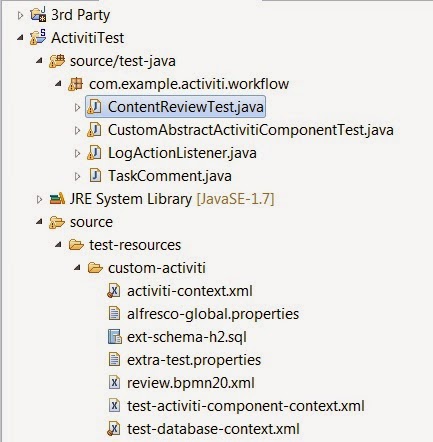
here. Below is the folder structure of the project. Note, I have placed a copy of the LogActionListener class under the test-java folder for conciseness. This test runs without requiring any additional deployment in Alfresco repository project.
To keep this project nimble, I have linked it to three Alfresco projects: '3rd Party', Core and Repository. These projects are from Alfresco SVN repository, version 4.2.2.
To see up your own environment, download the Alfresco code and imported them into my Eclipse instance.
Since I have dependency on H2 database Jar, I add it to Alfresco '3rd Party' project. Do the same, refer to
H2 home site.
The main test code resides in ContentReviewTest class. At this stage, you should be able to run the JUnit test.
At this stage, you should be able to invoked the test by clicking on ContentReviewTest and select 'Run As -> Junit Test'.
2. Setting up test framework
Let's go over how the test works. The heart of the test is the class CustomAbstractActivitiComponentTest. This class is modified version of Alfresco's
AbstractActivitiComponentTest class. It performs the following:
- Initializes Spring framework
- Mocks relevant Alfresco services
- Creates a number of dummy objects such as test user, an Alfresco NodeRef object
- Starts H2 database engine and creating test schema
Next, I will be covering the extensions I have made to
AbstractActivitiComponentTest.
2.1 Initializing Spring framework
Check out the code segment below. I am placing all test resources under 'custom-activiti' folder, refer to the project Eclipse folder diagram earlier.
@RunWith(SpringJUnit4ClassRunner.class)
@ContextConfiguration(locations={"classpath:custom-activiti/test-database-context.xml",
            "classpath:custom-activiti/test-activiti-component-context.xml",
            "classpath:custom-activiti/activiti-context.xml"})
The 'test-database-context.xml' file contains connection information for two databases: 1) used by Activiti engine and 2) our external test database. The 'test-activiti-component-context.xml' defines beans such as NodeService used in mocking different Alfresco services. Finally 'activiti-context.xml' is the Activiti context file. In there I have defined beans extDataSource and LogActionClass. Refer to previous blog for details.
2.2 Mocking Alfresco Services
A cardinal rule of unit testing is to be fast, no more than few seconds. Keep in mind, we are testing an Activiti listener and not the Alfresco system. It would be prohibitively time consuming to start and stop the Alfresco application for each test. A mock framework such as Mockito which is used by Alfresco offers a excellent solution here. The code below injects the PersonService mock object.
@Resource(name="PersonService")
protected PersonService personService;
the bean definition for it comes from test-activiti-component-context.xml.
<bean id="PersonService" class="org.mockito.Mockito" factory-method="mock">
    <constructor-arg value=" org.alfresco.service.cmr.security.PersonService" />
</bean>
Now as part of mocking the call to getPerson() method I instantiate a dummy 'testUserNode' which is returned when getPerson() is called.
//Creating a dummy NodeRef for testUser.
protected static final NodeRef testUserNode = new NodeRef("workspace://testUser/");
...
private void mockPersonService() {
  ...
  //Mocking a call to gePerson method.
  when(personService.getPerson(TEST_USER)).thenReturn(testUserNode);
}
The above code mocks the required behavior at test start up, check out method setUp() in the CustomAbstractActivitiComponentTest class.
2.3 Hooking up databases
As mentioned earlier we require two database instances: one for Activiti use and the other as an external test database. Again this is a unit test, we can't afford having a database server running as demon.
H2 database engine can easily be embedded in our test.
The test-database-context.xml holds a number of bean definitions which drive the database setup. The different database connection information come from 'alfresco-global.properties'. The bean 'extDataSource' creates a database source object for use by JdbcTemplate. To initialize the database schema and creating the required table, I am using the 'jdbc:initialize' tag. The ext-schema-h2.sql holds the SQL command to create my test table, article_actions. Here is the relevant segment of code from test-database-context.xml.
<bean class="org.springframework.beans.factory.config.PropertyPlaceholderConfigurer">
   <property name="locations">
     <list>
 <value>custom-activiti/alfresco-global.properties</value>
 <value>custom-activiti/extra-test.properties</value>
     </list>
   </property>
</bean>

<bean id="extDataSource" class="org.apache.commons.dbcp.BasicDataSource"
      destroy-method="close">
   <property name="driverClassName" value="${external_db.driver}"/>
   <property name="url" value="${external_db.url}"/>
   <property name="username" value="${external_db.username}"/>
   <property name="password" value="${external_db.password}"/>
</bean>

<jdbc:initialize-database data-source="extDataSource">
   <jdbc:script location="classpath:custom-activiti/ext-schema-h2.sql"/>
</jdbc:initialize-database>
At end of each test, the method truncateTaskComments() truncates the test table in preparation for next test run.
@After
public void truncateTaskComments() {
  //Truncate the comments after each test.
  String query = "TRUNCATE TABLE article_actions";

  jdbcExtTemplate.execute(query);
  return;
}
One last note on the subject, to have Activiti create and initialize its schema at test start up, make sure you change the 'databaseSchemaUpdate' value from 'none' to 'true' in activiti-context.xml file. Otherwise you get an exception error about some missing Activiti table.
<bean id="activitiProcessEngineConfiguration"
      class="org.alfresco.repo.workflow.activiti.AlfrescoProcessEngineConfiguration">
    <property name="dataSource" ref="wrappedDataSource" />
    <property name="transactionManager" ref="transactionManager" />
    <!-- This would direct Activiti to create schema before testing starts! -->
    <property name="databaseSchemaUpdate" value="true" />
3. Testing the workflow
Bellow I am including the test code which deploys the workflow, starts it, then on behalf of a test user approves and then completes. For the final step, it validates the database to make sure a new record has been created and the action field has the word 'approved'.
Some notes, since I don't have access to GUI, I am programmically making transitions from different user tasks. The test is a bit brittle since, for each transition, I am hard coding the sequence flow id. This id could change if the workflow process definition is updated.
@Test
public void testExDBLogged() throws Exception
{
  String reviewerComment = "Reviewer comment goes here!";
  String finalComment = "Final comment goes here!";

  WorkflowDefinition def = deployTestReviewDefinition();

  // Fill a map of properties as input to workflow with it starts.
  Map<QName, Serializable> properties = new HashMap<QName, Serializable>();
  Date dueDate = Calendar.getInstance().getTime();
  properties.put(WorkflowModel.PROP_WORKFLOW_DESCRIPTION, "An article for review!");
  properties.put(WorkflowModel.PROP_WORKFLOW_DUE_DATE, dueDate);
  properties.put(WorkflowModel.PROP_WORKFLOW_PRIORITY, 2);
  properties.put(WorkflowModel.ASSOC_ASSIGNEE, TEST_USER);

  // Instantiate and start the workflow.
  WorkflowPath path = workflowEngine.startWorkflow(def.getId(), properties);
  assertNotNull("The workflow path is null!", path);
  String executionId = BPMEngineRegistry.getLocalId(path.getId());
  Execution execution = runtime.createExecutionQuery()
                               .executionId(executionId)
                               .singleResult();
  assertNotNull("No execution was created in the DB!", execution);

  WorkflowInstance instance = path.getInstance();
  String procInstanceId = BPMEngineRegistry.getLocalId(instance.getId());
  // Query for handle to 'Review task' task instance.
  Task task = taskService.createTaskQuery().processInstanceId(procInstanceId).singleResult();

  // Validate the task is the 'Review task'.
  WorkflowNode node = path.getNode();
  assertNotNull("The workflow node is null!", node);

  // Check to see if the workflow transitioned into 'reviewTask'.
  assertEquals("reviewTask", node.getName());

  // Logs reviewer's comment.
  setCurrentUserTaskComment(procInstanceId, "testUser", reviewerComment);

  // Approve and submit 'Review task'.
  runtime.setVariable(procInstanceId, "wf_reviewOutcome", "Approve");
  node = submitToNextTask(instance.getId(), task, "flow3");

  // Check to see if the workflow transitioned into 'approved'.
  assertEquals("approved", node.getName());

  // Finish the review.
  task = taskService.createTaskQuery().processInstanceId(procInstanceId).singleResult();
  runtime.setVariable(procInstanceId, "bpm_comment", finalComment);
  String transition = "flow5";
  WorkflowTask nextTask = workflowEngine.endTask("activiti$" + task.getId(), transition);
  path =  nextTask.getPath();
  assertEquals(false, path.isActive());

  // Check article_actions table for new record.
  List<TaskComment> comments = getAllTaskComments();
  assertEquals(1,comments.size());
  TaskComment comment1 = comments.get(0);
  assertEquals("approved", comment1.getAction());
}
Once more to get the Eclipse project with all the source code, click
here.